Archive

Tag Archives: recipe

Recipe: Mom’s Apple Pie
Time: 1.5 hours
Expectations: Always a winner

01397229552f0676d199bb414a4f140371f3dedfbe

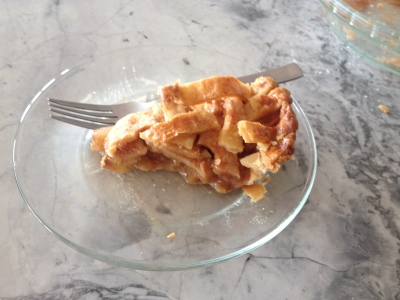
Since I can remember, my Mom has made a killer apple pie.  You know, its one of those pages in the recipe book that is barely legible anymore because of all of the kitchen use.  This recipe is adapted from a very old Betty Crocker cookbook.

01e5d8a4dd1e9dff26477e023471b46a638d6af091

I love going to an orchard and picking apples for the pie.  They add such a lovely flavor and sense of accomplishment.  However, this recipe is still wonderful with store bought apples.  I like to use a variety of apples for textural variety and increased flavor.  You can increase or decrease the amount of sugar, depending on the sweetness of your apples.

After the first time we went apple picking, we knew we had to get an apple peeler/slicer.  It really is a game changer.  It significantly reduces the time commitment of preparing an apple pie and, let’s be real, it is so much fun to use!!!  Which is of course, the number one most important thing in the kitchen for me.  We got a clamp base peeler on Amazon for around $20 – you can also get it with a suction cup base, if that is your preference.  Even if you aren’t making apple based food on the regular, the peeler can be used for potatoes, too.

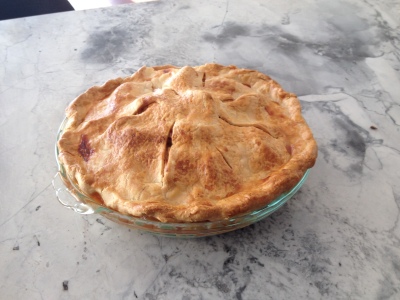
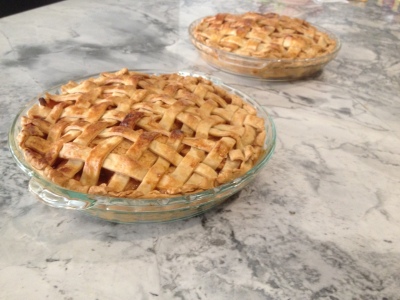
For simplicity and consistency, I use Pillsbury Pie Crusts.  These are in the refrigerated section of the store.  I always know my pie crust will turn out beautifully when I use these crusts.  Some day I might get around to making my own crust.  I like to do a lattice top because it is simple to execute and brings a “wow” factor to the finished pie.

Non-Latticed Top : Still beautiful!

Non-Latticed Top : Still beautiful!

How to lattice:  I recommend you watch a quick youtube video to get the gist.  Lightly flour your countertop and lay the pie crust flat.  Use a sharp knife to cut the crust into equally sized strips (apprx 1/2″ thick).  Pick every other strip and lay it on top of your pie, equally spaced.  Then, take every other strip and fold it back, half way across the pie.  Place a strip perpendicularly across the pie, approximately across the middle.  Unfold the folded strips, creating a “weave”.  Continue the same, folding back alternating strips until you have added all of the strips to the pie.

Mom's Apple Pie

  • Servings: 8+
  • Difficulty: Medium
  • Print

Ingredients

  • 1 box Pillsbury pie crust (2 crusts) or homemade crust of your choosing
  • 8-10 apples, a variety if you please
  • 2-3 tbsp lemon juice
  • 3 tbsp all-purpose flour
  • 3/4c brown sugar
  • 1/4c white sugar
  • 1 tsp finely grated lemon peel
  • 1-2 tsp cinnamon
  • 1 tsp mace
  • 1 tsp nutmeg
  • 1-2 tsp cornstarch, optional
  • 5 tbsp butter, softened
  • 2-3 tbsp vanilla extract
  • 1 egg white

Directions

  1. Set out pie crusts to warm up a bit.
  2. Preheat oven to 425 degrees (F).
  3. Core, peel, and slice apples.  Thickness is to personal taste (certainly under 1/2 inch so it will cook enough).  Place apple slices into a large bowl and add lemon juice.  Mix the apples and lemon juice gently with your hands.
  4. In a separate bowl, mix flour, sugars, lemon peel, cinnamon, mace, and nutmeg.  I like to add a bit of cornstarch to this mixture to help make the pie more “slicable” (without all of the filling oozing out of the slice).
  5. Slowly add the flour/sugar mixture to the apples and mix with hands.
  6. Unroll the first pie crust and slowly shake it out.  Hold one edge of the crust with your hands and let it stretch down a bit – continue rotating around the crust to let it stretch in each direction.  Then, line the pie pan with the crust, creating the bottom crust, with the edges gently overhanging the pie pan.
  7. Pour the apple mixture over the bottom crust.  For a “window sill” pie, leave the apple mound just a bit higher in the middle of the crust.  This will create a gentle slope.
  8. Sprinkle the vanilla extract over the apples.
  9. Slice the butter into smaller pieces and lay the over the apples evenly around the pie.
  10. Gently add the top crust.  You can do this in a lattice pattern or solid.  If you do a solid piece, be sure to slice the top crust to create vents which allow steam to escape.
  11. Brush the top crust with egg whites.
  12. Create a long strip (apprx 2″ tall) of aluminum foil.  The strip should be long enough to wrap around the outside of the pie.  Wrap around the outside of the pie to cover the edges of the crust to prevent burning.
  13. Bake the pie on 425 for 40-50 minutes.  Remove the aluminum foil with about 10 minutes remaining.  The pie top will be a nice golden brown and the apple mixture boiling.

userexpectations.com

Recipe: Homemade Peppermint Patties
Time: 6.5+ hours (at least for me!!)
Expectations: Delicious, Beautiful, Time Consuming

IMG_2942

After dinner last week, I bought one of the 25c peppermint patties on the way out of the Mexican restaurant.  It was great!  The freshness of the peppermint and the richness of the chocolate – just one delicious bite – was just perfect after my heavy dinner.  Rarely can I feel satisfied with just one bite of dessert!

The next day when it came to deciding what I would bring to the family Christmas get together, I knew I had to try to make peppermint patties.  A while back, I had pinned a “no bake” mint recipe on Pinterest and had been wanting to make it.  When it was time to make the shopping list, I decided I needed to find a chocolate coated peppermint patty recipe and looked at numerous sites before I settled on one from Brown Eyed Baker.  While I dispute her characterization of “easy”, they really are delicious!  Maybe it was just hard for me because I have never really made any sort of candy before.  By the end (of 87 peppermint patties, through multiple stages), we had it down pretty well.  (We because I had the best kitchen assistance you can ask for – Mom!)  I followed the recipe very closely, but increased the time on both the refrigeration steps.  Without the increased time, it is very very difficult.

IMG_2910

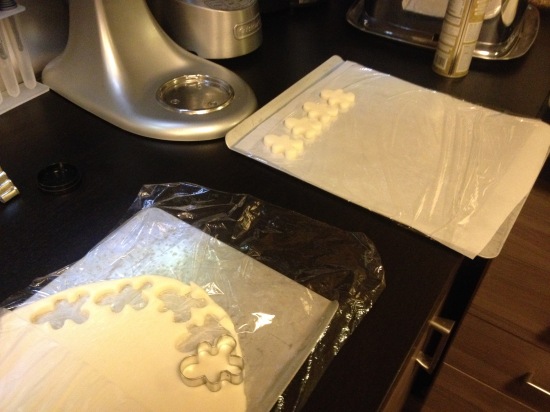
The peppermint inside is fairly easy to make – but thick!  You might not want to make this unless you have a Kitchenaid with a dough hook (or an arm of steel).  You toss in all of the ingredients (powdered sugar, evaporated milk, light corn syrup, coconut oil, peppermint extract) and mix.  Then, separate the dough into two approximately equal balls wrapped in saran wrap and flatten to the thickness you want for your peppermint patties (about 1/4″).

Refrigerate at least one hour and cut into the shapes you want for your patties (rounds are the most forgiving during the chocolate step).  I tried only 30 minutes in the fridge here and it did NOT work!! I ended up tossing them back in and going to dinner before trying the cookie cutters again – then it worked like a charm!  You will want to store these on saran wrap because they are STICKY STICKY STICKY!!  Parchment doesn’t cut it; parchment covered in coconut oil doesn’t cut it!

IMG_2887

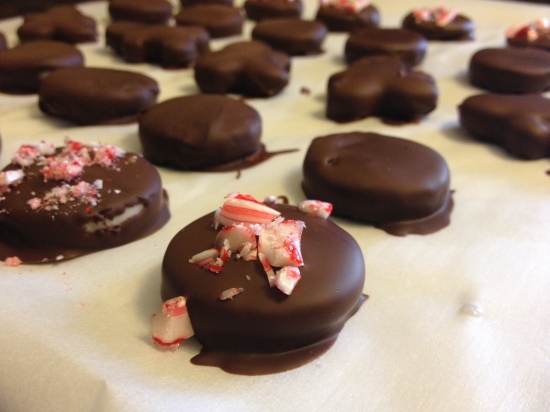
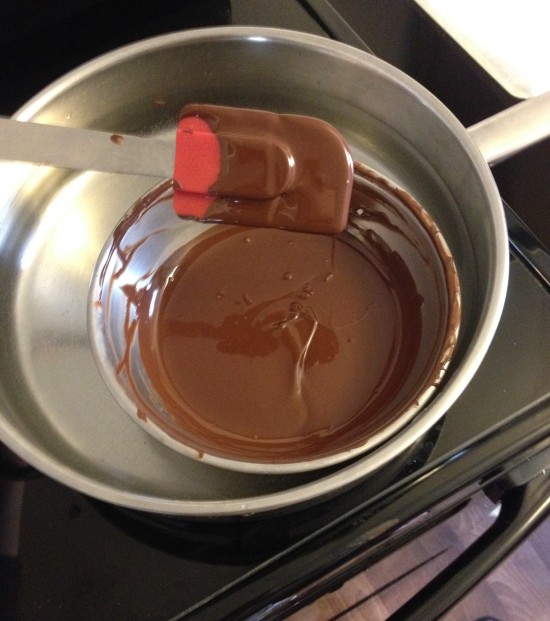
Refrigerate over night (or at least one more hour).  When you are about ready to cover with chocolate (or about 30 minutes prior), pop the peppermint patties into the freezer – this will make the chocolate coating much easier.  Prepare a baking sheet to place the patties on after dipping them in chocolate (I used parchment sprayed with coconut oil).  Then, melt your chocolate in a double boiler.  To do this, bring water to a near boil (or light boil and turn it down) and then place a heat resistant bowl with the chocolate inside.  Do not get the water too hot!!  During the chocolate melting, I really like to coddle the chocolate, constant stirring.  Once it is fully melted, begin with a few peppermint patties (I did five at a time).  Place a peppermint filling on a fork and then dip it in the chocolate – pull it out and let the excess drip off or rub it off the bottom with the side of the bowl.  Place each piece on the prepared cookie sheet to cool at room temperature for at least an hour.  Do not worry too much if the chocolate gets a bit all over the sheet; once they are completely cooled, they will peel off pretty easily.

If you want a crumble of peppermint on top, just smash a few candy canes in a bag and sprinkle the tops immediately after dipping!

IMG_2900 (2)

For me, the colder I got everything (except the chocolate) the better it worked!  I popped each baking sheet into the freezer before it was used.  My Mom only pulled out 5 peppermint fillings out at a time for dipping so that they would be as cold as possible.

IMG_2906

Then serve!  You can also store these for a while (weeks) in the refrigerator.

IMG_2948

Homemade Peppermint Patties

  • Servings: 50-90 mints
  • Difficulty: hard
  • Print

Ingredients

  • 7 1/2 cups of powdered sugar
  • 1/3 c evaporated milk
  • 1/3 c light corn syrup
  • 3 tbsp refined coconut oil
  • 1.5 tsp peppermint extract
  • 20-24 oz dark chocolate (I used Ghirardelli 60% cocoa bittersweet and a bit of German baker’s chocolate)

Directions

  1. Sift the powdered sugar.
  2. Mix the powdered sugar, evaporated milk, corn syrup, coconut oil, and peppermint extract in an electric mixer on low.  It will turn into a pretty thick, sticky dough.
  3. Separate the peppermint dough into two equal size balls.  Place each ball between two pieces of saran and roll to approximately 1/4″ thick.  Refrigerate at least one hour.
  4. Line a baking sheet with saran to place the cut peppermint patties on (I needed two sheets).  Place the first piece of rolled peppermint dough onto the counter and remove the top piece of saran.  Use a small cookie cutter to cut into rounds (or shapes, if you’re bold!).  Place each round onto the prepared cookie sheet.  Collect scraps, roll out again, and cut into more rounds (repeat until all peppermint dough is cut into rounds).
  5. Place the baking sheet into the fridge over night (at least one hour).  When you are ready to begin the coating process, move the sheet into the freezer for at least 30 minutes.
  6. Prepare a baking sheet by covering it with parchment (to place dipped patties on).
  7. Crush candy canes in a ziplock bag to prepare topping.
  8. Melt chocolate in a double boiler (over low heat) and keep the chocolate melted in the double boiler.  Stir the chocolate regularly while melting.  I keep the chocolate on very low heat the entire time I was dipping peppermints.
  9. One round/patty at a time, dip into the chocolate using a fork.  (I like to place it in the chocolate with my hands, flip, and then pull it out with a fork).  Let excess chocolate drip off, or rub it off the bottom with the edge of the bowl.  Place each chocolate on the parchment prepared baking sheet.
  10. Cool peppermint patties at room temperature for at least 1 hour.  After fully cooled, store in refrigerator for a few weeks,

userexpectations.com; minimally adapted from Brown Eyed Baker


Recipe: Mediterranean Crescent Wreath
Time: about 30 minutes
Expectations: More than exceeded. Delicious!

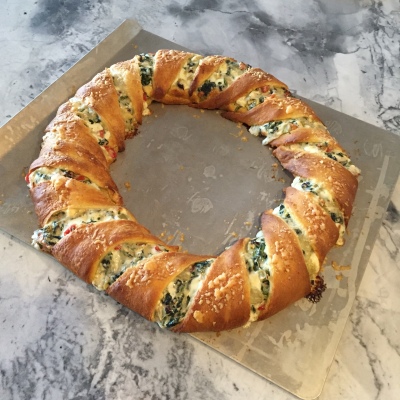
Mediterranean Crescent Wreath

This weekend we had family over for a holiday get together.  It was great to have everyone into our home to enjoy good company and delicious food.  Many of our family members are vegetarian and a number of them do not eat eggs, so it is always a new adventure for me to find delicious veg/egg free food to serve.

This recipe is AMAZING!  The flavors will blow you away, the presentation is beautiful, and it is SO easy to make!  I based my crescent ring on a recipe I found on “Erica’s Recipes” with very minimal changes.  Did you even know Pillsbury Crescent Rolls were egg free?!

Mediterranean Crescent Wreath

This recipe is so simple to execute – do not think the presentation is beyond your skills!  You simply create the “wreath” using Pillsbury crescent rolls, mix together all of the ingredients in one bowl, “stuff” the wreath with the filling, wrap over the ends, and bake.  I could not have been more pleased with its simplicity or flavor.

To create the wreath, prep a large cookie sheet by lightly spraying with cooking oil.  Divide your crescent rolls into the perforated triangles.  Lay the triangles in a circle on the baking sheet, with the short triangle ends creating the inner circle.  Each triangle should slightly overlap the previous one.  It should look like a large star!!

If you have never worked with frozen spinach before, the key is to squeeze out as much water as possible.  You will find it in the frozen vegetables and it comes in a cube.  Be sure to lay it out a couple hours before you intend to use it so it can thaw.  Once it is fully thawed (or mostly thawed if you didn’t set it out early enough, like me!), take the spinach in your hands over the sink and squeeze as hard as you can a few times.  I like to wrap it in paper towels for another squeeze or two.  Then, toss it on a cutting board and chop through it a few times to make sure the bites won’t be too big.

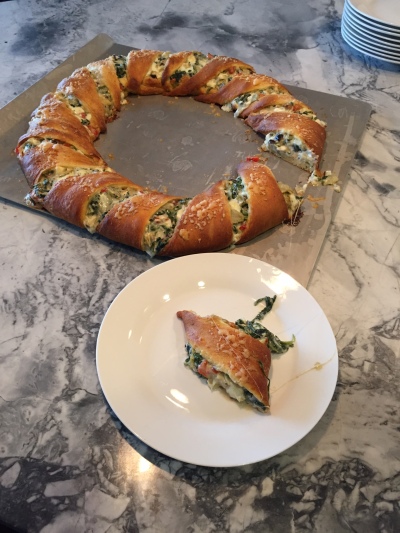
Mediterranean Crescent Wreath


I used as many fresh ingredients as possible, but if you have pre-shredded mozzarella or parm cheese at home – go for it!  I am a big proponent of using what you have on hand and I am sure the flavors would be just as delicious.

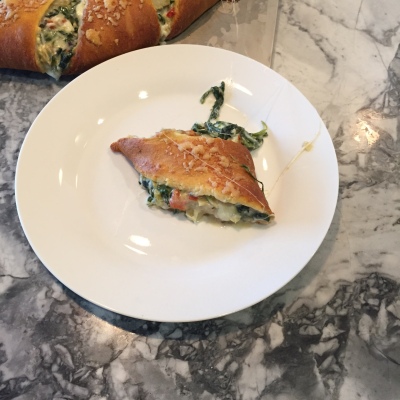
Mediterranean Crescent Wreath with Feta, Mozzarella, Spinach, and Artichokes

  • Servings: 15ish
  • Difficulty: easy
  • Print

Ingredients

  • 1 10oz package frozen chopped spinach, thawed and drained
  • 1 12oz jar artichoke hearts, chopped
  • 8oz fresh mozzarella, chopped
  • 1/2c garlic and herb flavored feta
  • 1/2c diced roasted red bell pepper
  • 1/4c chopped calamata olives
  • Fresh cracked pepper
  • 1/2c canola oil “mayo” (vegan, egg free)
  • 2 cloves garlic, minced
  • 2-4tbsp chopped fresh dill
  • 2 8oz package crescent rolls
  • 2+ tbsp grated Parmigiano-Reggiano

Directions

  1. Heat oven to 375 degrees (F).
  2. Prepare a large baking sheet by spraying it with cooking spray (I prefer the spray coconut oil).  Unroll crescent roll dough and separate into triangles.  Lay the dough triangles in a circle, with the shortest triangle edges towards the center, slightly overlapping each other.  It should look like a large star!
  3. In a large bowl, mix all of the ingredients except the Parmigiano-Reggiano.  That means the: spinach, artichoke, mozzarella, garlic, feta, roasted bell peppers, olices, pepper, canola oil mayo, garlic, and dill.
  4. Use a spoon to transfer the mixture onto the crescent wreath, towards the middle.  Create a large mound atop the crescent rolls all the way around the wreath.
  5. Fold the triangle ends over the mound towards the center.
  6. Sprinkle Parmigiano-Reggiano atop the wreath.
  7. Bake for 20 minutes (the wreath should appear lightly to moderately browned and the filling should be heated through).  Pull it out of the oven to impress your guests! Cut with a sharp knife and serve.

userexpectations.com; minimally adapted from Erica’s Recipes